

The issue
The classic issue that arises when writing a scripted test: Is the test documented well enough? What does it actually test? Are there any comments in the script? Could you add a step by step procedure to be able to reproduce the failure? And there might be other questions to.
What if I could show you that there is a way to do all these things in one go?
Alternatives
First, let’s take a quick look into Cypress built in tools: The cy.log() method, screenshot and video recording tools. Why not use those features?
Well, for some purposes these features are more than enough to help you with debugging. Especially if your tests are short and does not require many steps. But what if your tests are quite long and you run in a headless environment? Your console log will give you some information, but not the steps to reproduce nor document your test. A screenshot is good, but what about the steps to get to the point where the screenshot was taken? Is there a specific sequence of steps I need to do to reproduce the failure that leads to the screenshot being taken? What about the video, it is great. However, what about the size of the video? Quite big I assume compared to a few kbyte log file.
But there’s another way!
Now, let’s dig into the idea that I am talking about which is very simple yet powerful. You use comments written in the script and add a custom made function to create a log file! This log file will be your best friend when lost developers ask you for steps to reproduce and it will help you understand the test itself since most of us tend to forget stuff after a while.
I use the Cypress framework and JavaScript to show you doubters a beginner / intermediate level example. Remember that the idea is the value here and not the code. I will let you decide if this is something suitable for your project or not 🙂
Practical example
Prerequisites: Running instance of Cypress (I used version 13.11) on your machine with the standard folders available.
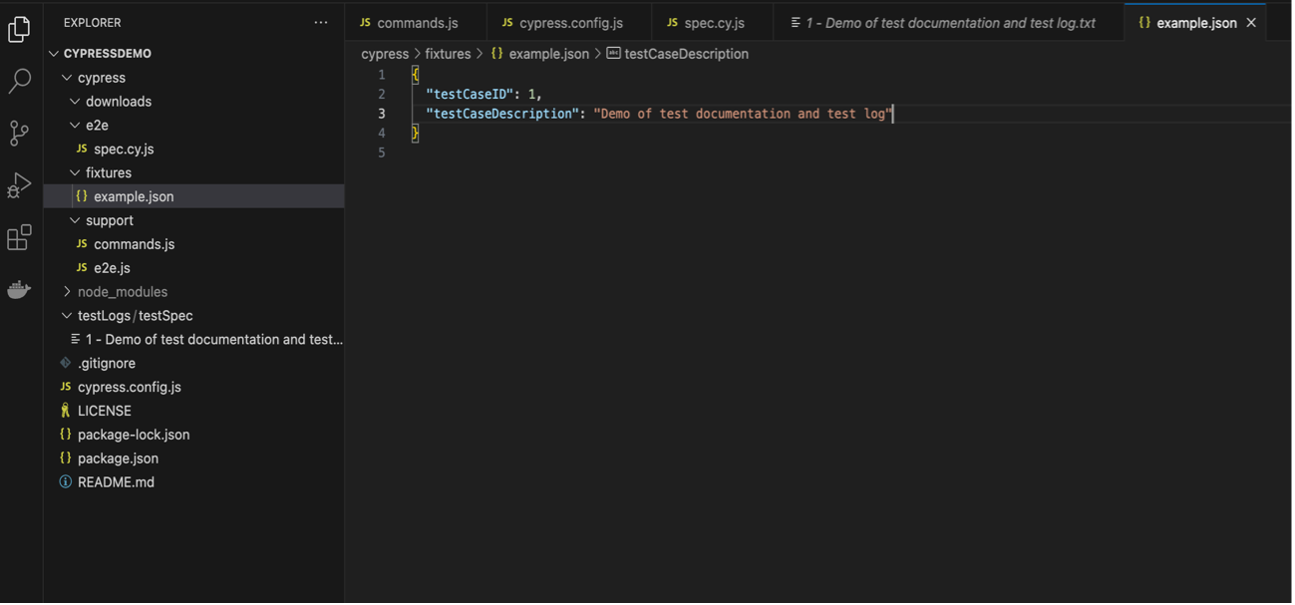
Step 1
Add example.json with its content in the fixture folder.
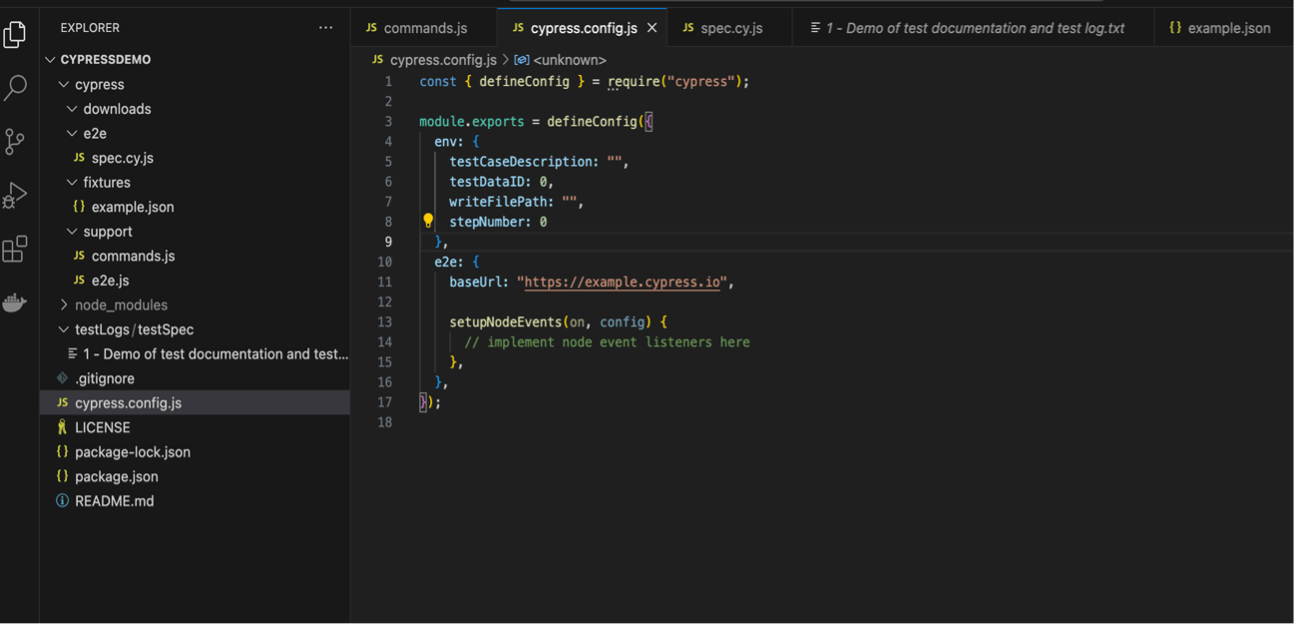
Step 2
Add the env variables to the cypress.config.js file
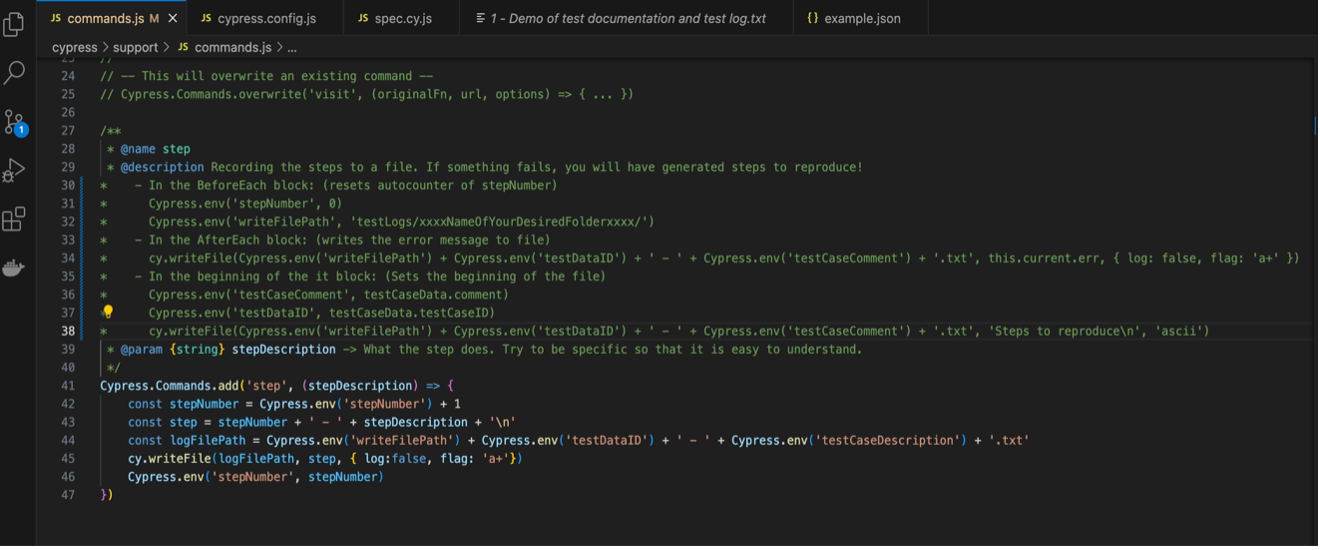
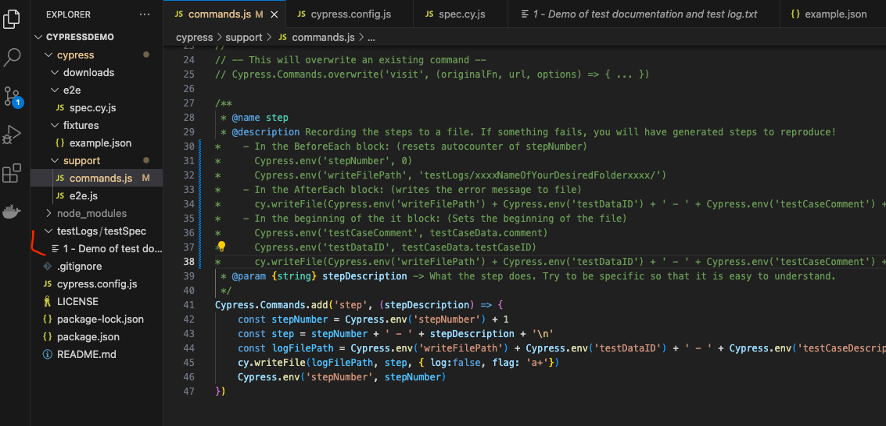
Step 3
Add the step function in the commands.js file
Step 4
Add the following script to the spec.cy.js file

Step 5
There. Now you should be ready to run the spec file and see the result.
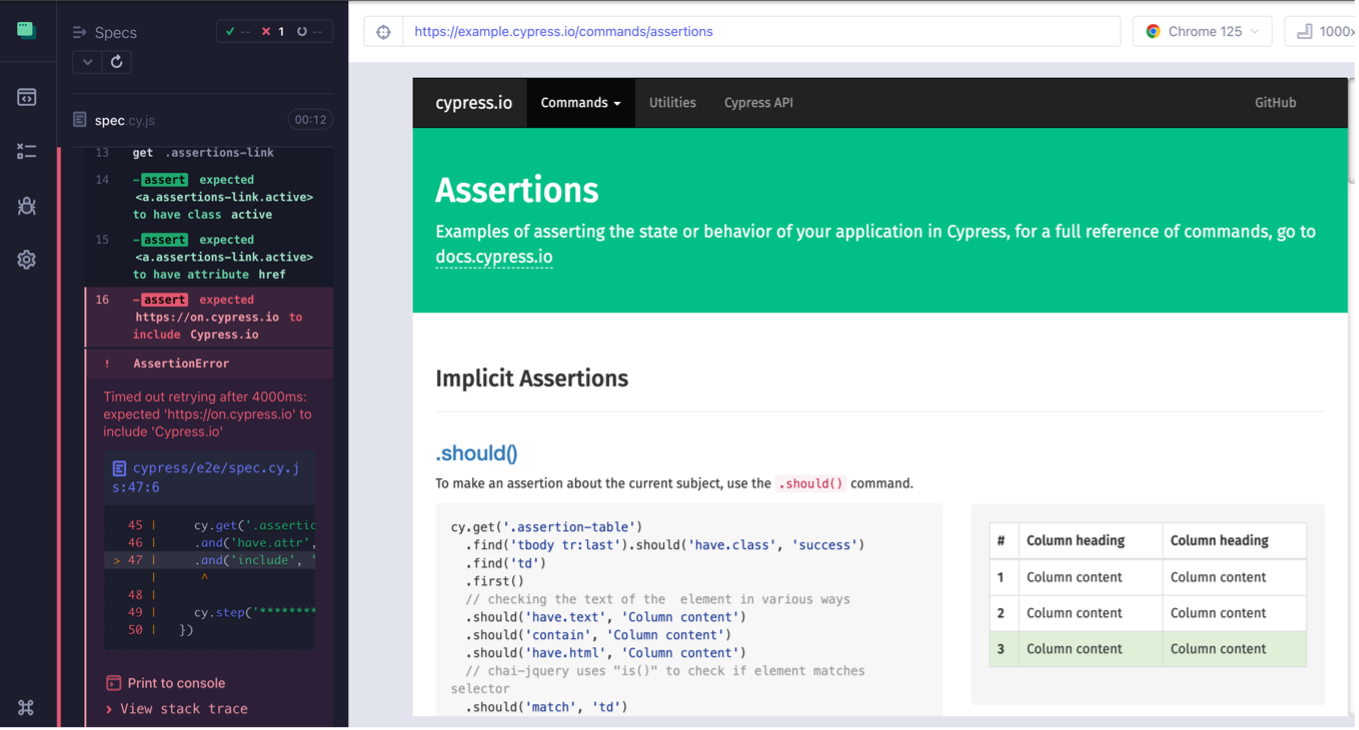
Step 6
Ahh.. Darn. The test FAILED.
Step 7
Take a look in the testLogs/testSpec folder. Here you will find a log file.
Step 8
Click the 1 – Demo of test documentation and test log.txt file and observe the magic
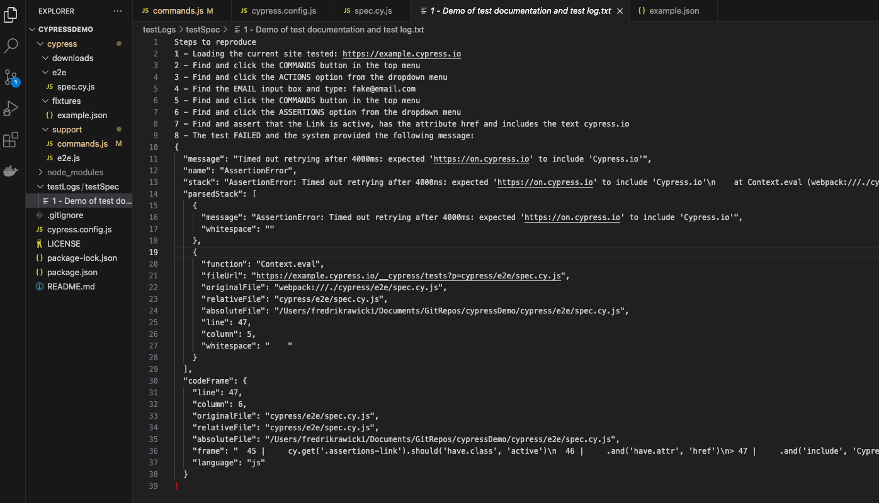
Each line is a description / comment to a line of code. The comment states what the code does and what input it provides to the system under test. This means that you know which part of the script that has been executed and where it fails. The error message is the one from the system and will also help you in understand why the test fails. Thus making it easier for you to debug your script and also quite easy to provide a step by step procedure for the developers when they need to debug any issues.
Happy testing! 🙂
This blog post was written by:

Fredrik Rawicki
Senior test engineer
Fredrik is a dedicated, skilled and experienced tester who enjoys working in a busy and fast-paced environment. He has worked in testing and quality assurance at Kongsberg for many years, in both larger and smaller projects, and has extensive experience in testing highly complex and security critical systems requiring high precision and a systematic approach to all stages of the testing work.